SEGMENT IV: Creating Successful Groupings of Artwork
Ever walk into a showroom or an art collector’s home that has large groupings of art hanging on the wall and it simply looks great?
If you have never tried hanging your artwork in groups, you just might be missing out on one of the most practical ways to consolidate your art collection (and make room for new art acquisitions) while creating strong focal points of interest in your surrounding environment. The process is not difficult but it does require planning beyond simply placing a nail in the wall. Scale, arrangement and balance all must be considered when hanging groups of work.
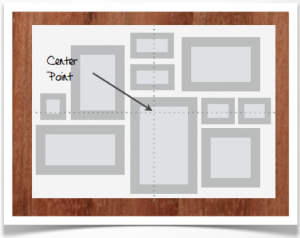
As previously discussed, think of the space where you are hanging art as one large shape in which you will group the artwork, keeping the largest piece more centered within the grouping and from which you will work other pieces.
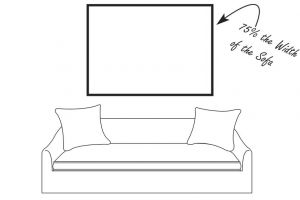
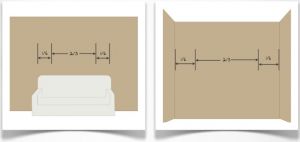
Keep in mind the 2/3 principle, regardless if it is a blank wall or being placed above a piece of furniture, to allow breathing room around the grouping, just as when using one large scale piece of artwork.
Select the works that you want to group with consideration to the following:
1. Works that have similar subject matter, color palettes, genres can be grouped successfully regardless of frames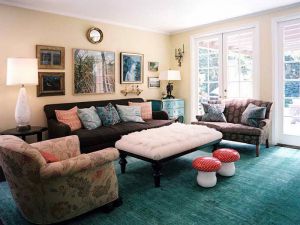
2. Works of a diverse subject matter, color palette and genres can be grouped more successfully by choosing either a same frame or similar color of frame as seen in the image to the right.
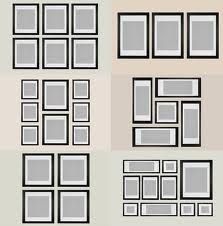
3. When grouping works, there are a variety of styles of grouping one can choose from to create balance and harmony within the collection while permitting further growth of the collection. These group configurations are simply ideas to help start the process.
Once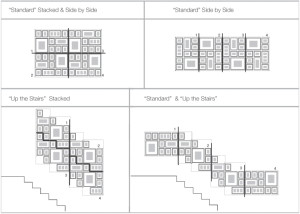
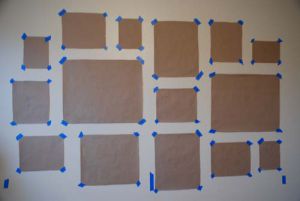
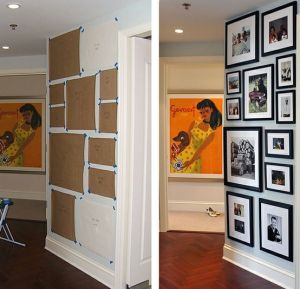
I hope this segment on grouping artwork has opened up a new avenue in how to pull a collection of artwork of homogeneous or eclectic pieces into a cohesive display of art while providing you with more wall space to continue your art collection. I hope you will join me again for our next Art Talk segment.
Many thanks to the various sources who provided images for this segment-scottandersaondesign, howtodecorateitonline, and the ballard design team.


